Komiser:Multiple AWS Accounts Support

Releases keep rolling ! I’m thrilled to announce the release of Komiser:2.2.0 with support of multiple AWS accounts 🎊 🎉


But that’s not all, check the whole changelog to get an idea of the awesome work that has been done on this release. Lots of bugs have been fixed and we also have been working on adding amazing features.

Highlights

Komiser support multiple AWS accounts through named profiles that are stored in the config and credentials files. You can configure additional profiles by using aws configure with the --profile option, or by adding entries to the config and credentials files.

The following example shows a credentials file with 3 profiles (production, staging & sandbox accounts):

1
2
3
4
5
6
7
8
9
[Production]
aws_access_key_id=<AWS_ACCESS_KEY_ID>
aws_secret_access_key=<AWS_SECRET_ACCESS_KEY>
[Staging]
aws_access_key_id=<AWS_ACCESS_KEY_ID>
aws_secret_access_key=<AWS_SECRET_ACCESS_KEY>
[Sandbox]
aws_access_key_id=<AWS_ACCESS_KEY_ID>
aws_secret_access_key=<AWS_SECRET_ACCESS_KEY>

To enable multiple AWS accounts feature, add the multiple option to Komiser:

1
komiser start --port 3000 --redis localhost:6379 --duration 30 --multiple

If you point your browser to http://localhost:3000, you should be able to see your accounts


You can now analyze and identify potential cost savings on unlimited AWS environments (Production, Staging, Sandbox, etc) on one single dashboard.

The versioned documentation can be found on https://docs.komiser.io.

Komiser is written in Golang and is MIT licensed — contributions are welcomed whether that means providing feedback or testing existing and new features.


https://komiser.io

Drop your comments, feedback, or suggestions below — or connect with me directly on Twitter @mlabouardy.

Highly Available Docker Registry on AWS with Nexus

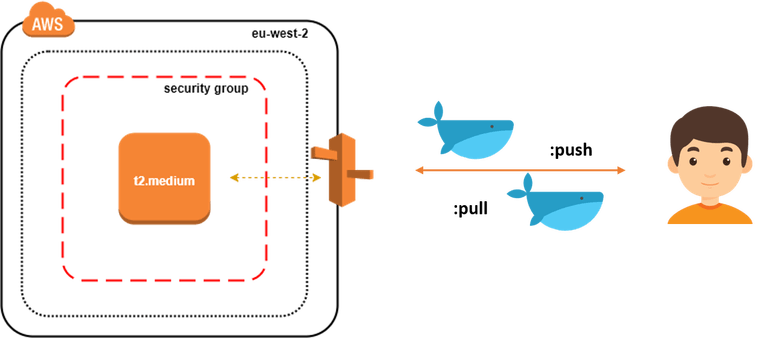
Have you ever wondered how you can build a highly available & resilient Docker Repository to store your Docker Images ?


In this post, we will setup an EC2 instance inside a Security Group and create an A record pointing to the server Elastic IP address as follow:


To provision the infrastructure, we will use Terraform as IaC (Infrastructure as Code) tool. The advantage of using this kind of tools is the ability to spin up a new environment quickly in different AWS region (or different IaaS provider) in case of incident (Disaster recovery).

Start by cloning the following Github repository:

1
git clone https://github.com/mlabouardy/terraform-aws-labs.git

Inside docker-registry folder, update the variables.tfvars with your own AWS credentials (make sure you have the right IAM policies).

1
2
3
4
5
6
7
8
9
10
11
12
resource "aws_instance" "default" {
ami = "${lookup(var.amis, var.region)}"
instance_type = "${var.instance_type}"
key_name = "${aws_key_pair.default.id}"
security_groups = ["${aws_security_group.default.name}"]

user_data = "${file("setup.sh")}"

tags {
Name = "registry"
}
}

I specified a shell script to be used as user_data when launching the instance. It will simply install the latest version of Docker CE and turn the instance to Docker Swarm Mode (to benefit from replication & high availability of Nexus container)

1
2
3
4
5
6
7
#!/bin/sh
yum update -y
yum install -y docker
service docker start
usermod -aG docker ec2-user
docker swarm init
docker service create --replicas 1 --name registry --publish 5000:5000 --publish 8081:8081 sonatype/nexus3:3.6.2

Note: Surely, you can use a Configuration Management Tools like Ansible or Chef to provision the server once created.

Then, issue the following command to create the infrastructure:

1
terraform apply -var-file=variables.tfvars

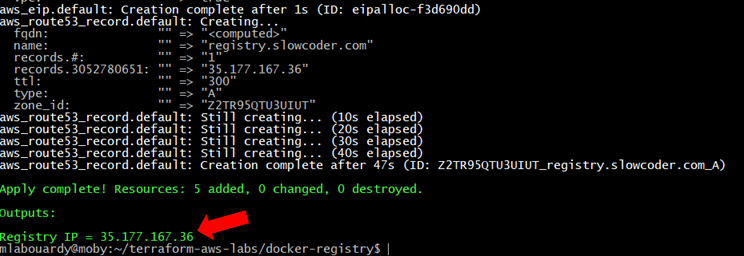
Once created, you should see the Elastic IP of your instance:


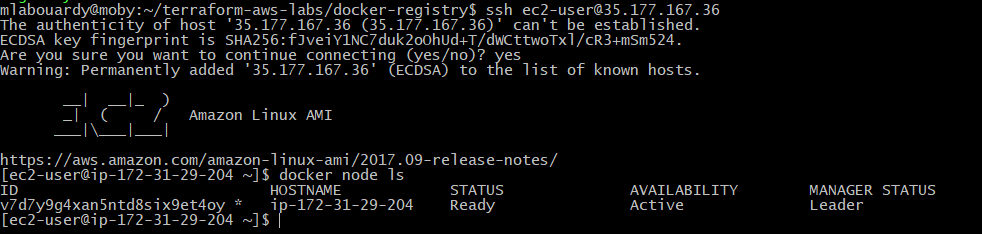
Connect to your instance via SSH:

1
ssh ec2-user@35.177.167.36

Verify that the Docker Engine is running in Swarm Mode:


Check if Nexus service is running:


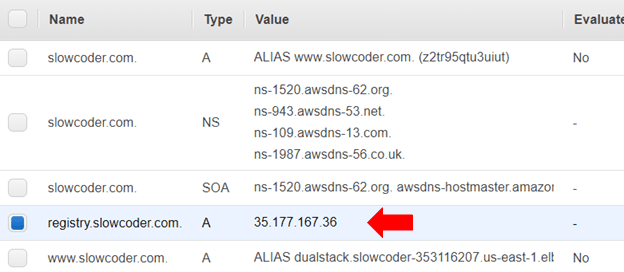
If you go back to your AWS Management Console. Then, navigate to Route53 Dashboard, you should see a new A record has been created which points to the instance IP address.


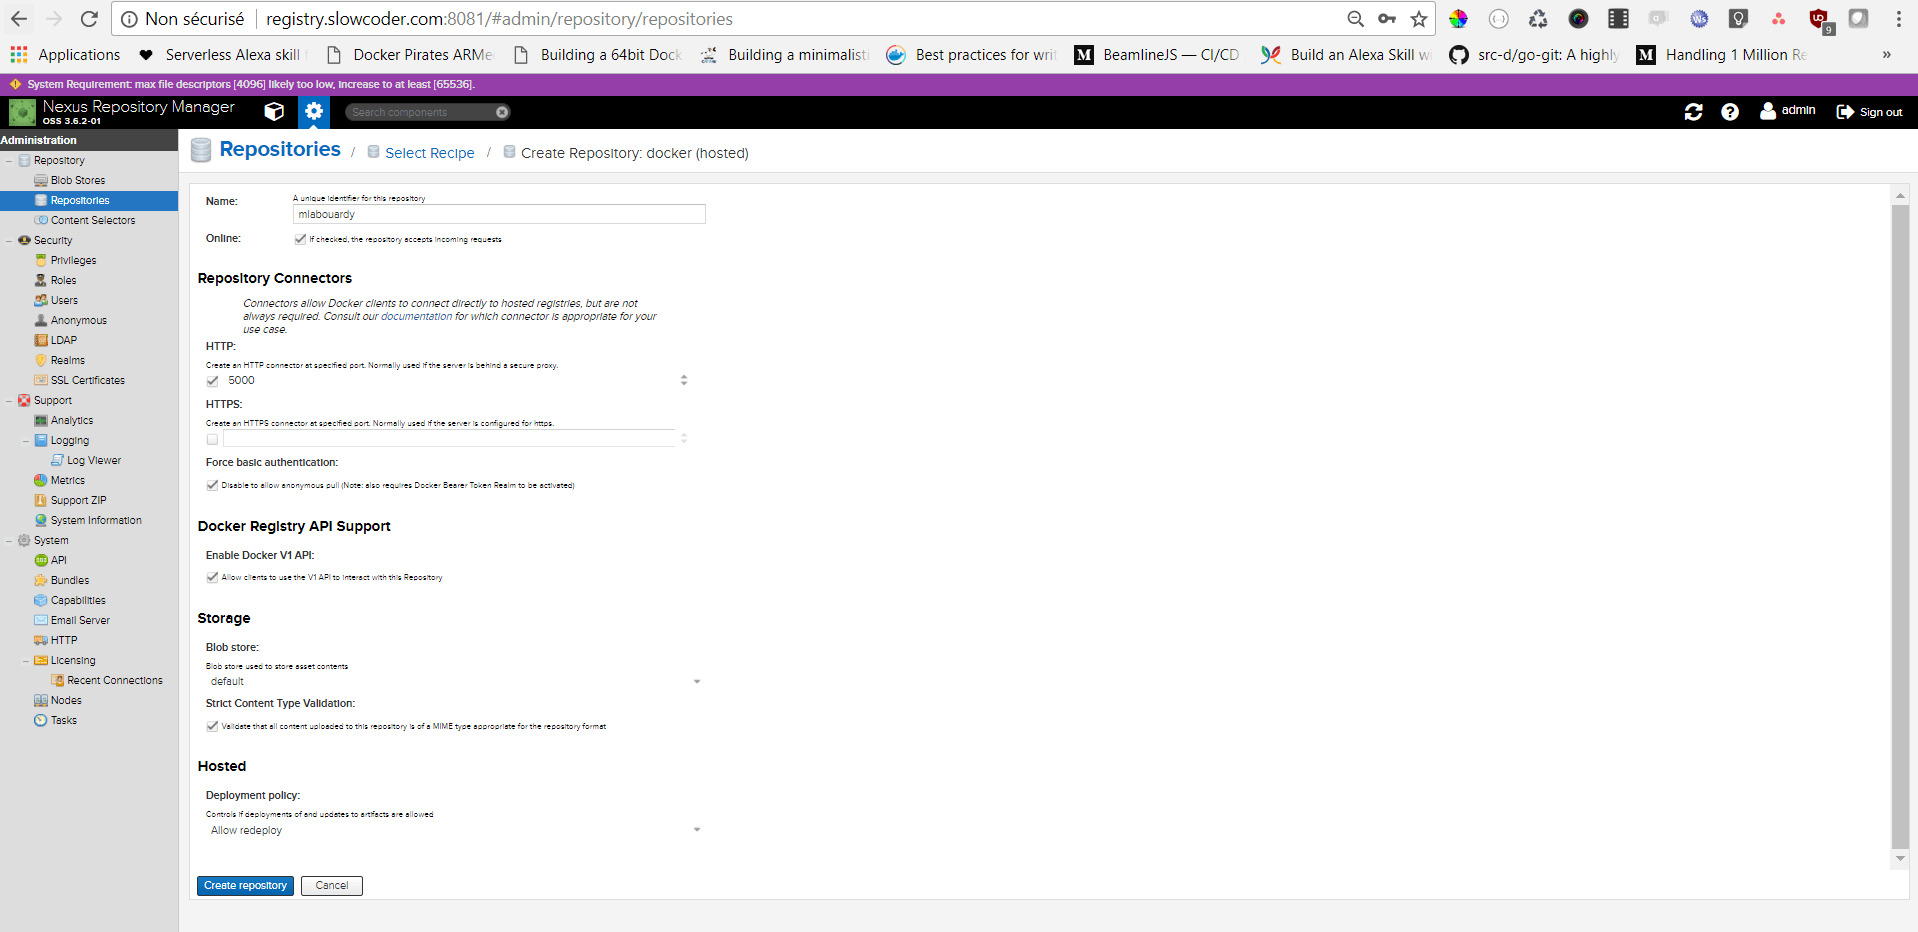
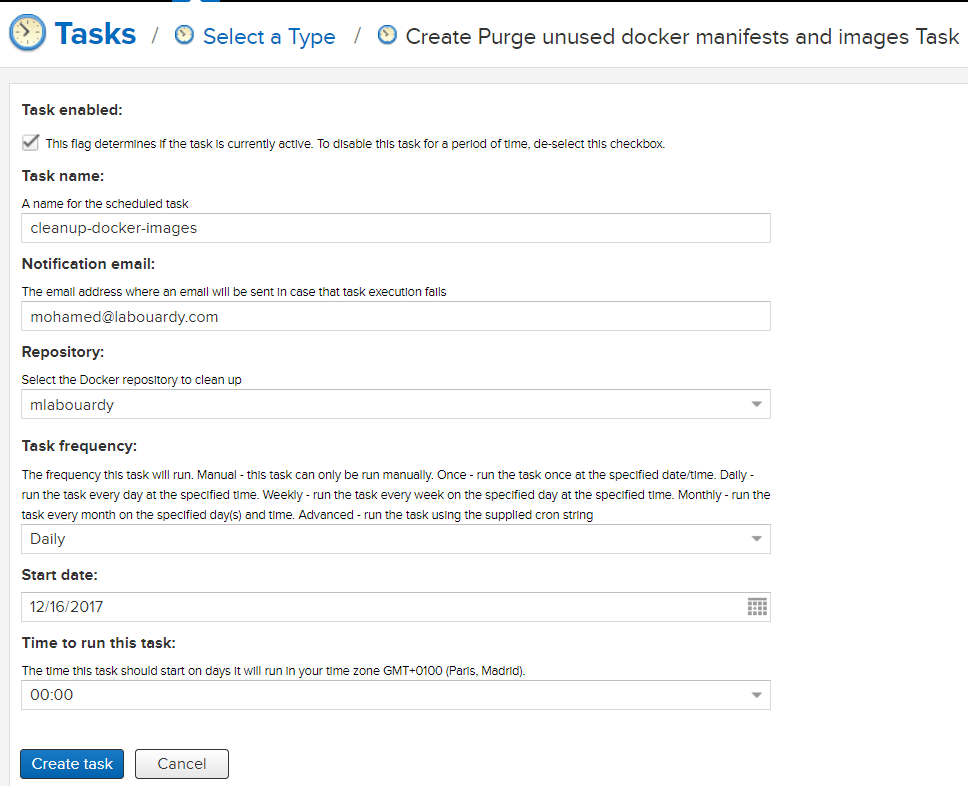
Point your favorite browser to the Nexus Dashboard URL (registry.slowcoder.com:8081). Login and create a Docker hosted registry as below:


Edit the /etc/docker/daemon.json file, it should have the following content:

1
2
3
{
"insecure-registries" : ["registry.slowcoder.com:5000"]
}

Note: For production it’s highly recommended to secure your registry using a TLS certificate issued by a known CA.

Restart Docker for the changes to take effect:

1
service docker restart

Login to your registry with Nexus Credentials (admin/admin123):


In order to push a new image to the registry:

1
docker push registry.slowcoder.com:5000/mlabouardy/movies-api:1.0.0-beta


Verify that the image has been pushed to the remote repository:


To pull the Docker image:

1
docker pull registry.slowcoder.com:5000/mlabouardy/movies-api:1.0.0-beta


Note: Sometimes you end up with many unused & dangling images that can quickly take significant amount of disk space:


You can either use the Nexus CLI tool or create a Nexus Task to cleanup old Docker Images:


Populate the form as below:


The task above will run everyday at midnight to purge unused docker images from “mlabouardy” registry.

Drop your comments, feedback, or suggestions below — or connect with me directly on Twitter @mlabouardy.

Komiser:AWS Environment Inspector

In order to build HA & Resilient applications in AWS, you need to assume that everything will fail. Therefore, you always design and deploy your application in multiple AZ & regions. So you end up with many unused AWS resources (Snapshots, ELB, EC2, Elastic IP, etc) that could cost you a fortune.

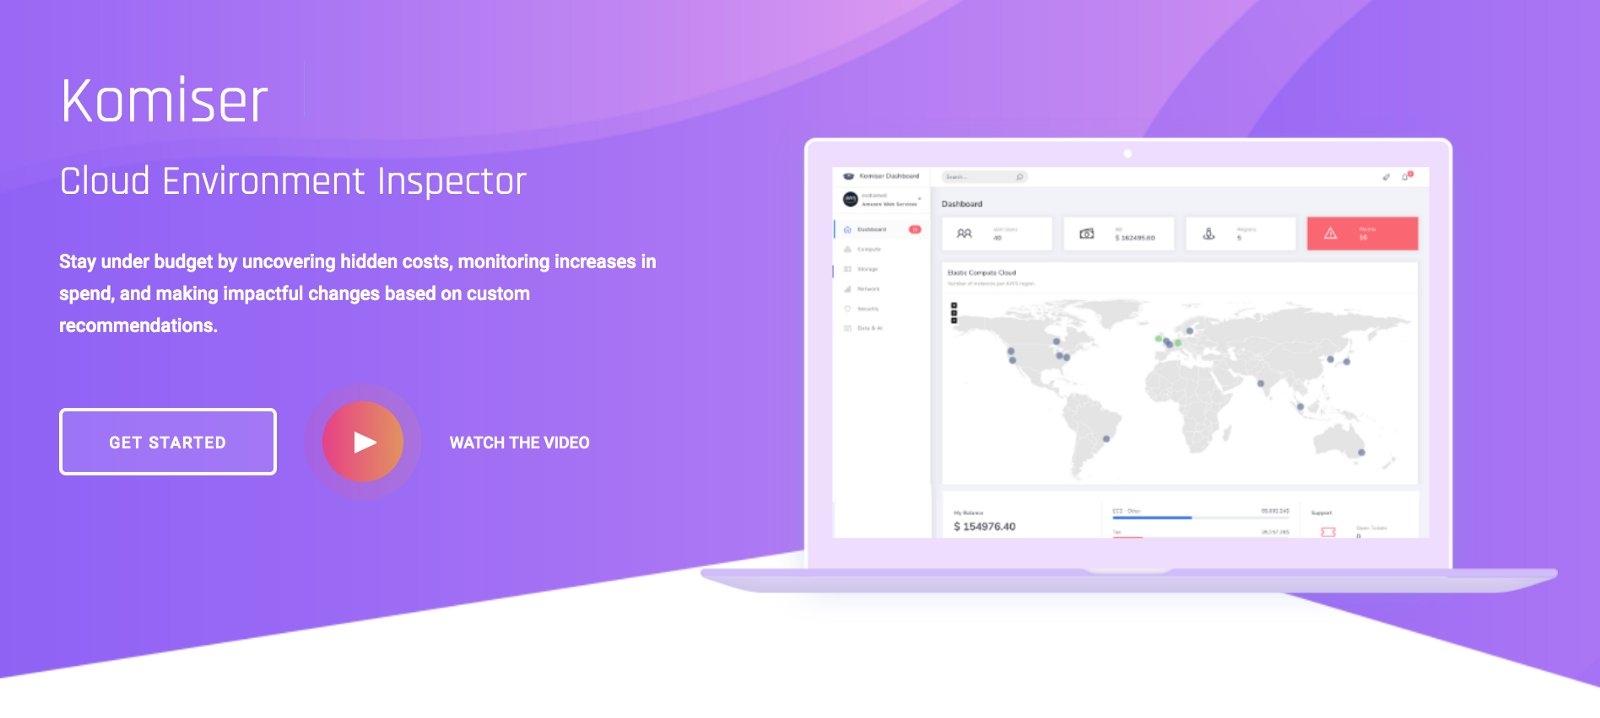
One pillar of AWS Well-Architected Framework is Cost optimization. That’s why you need to have a global overview of your AWS Infrastructure. Fortunately, AWS offers many fully-managed services like CloudWatch, CloudTrail, Trusted Advisor & AWS Config to help you achieve that. But, they require a deep understanding of AWS Platform and they are not straighforward.


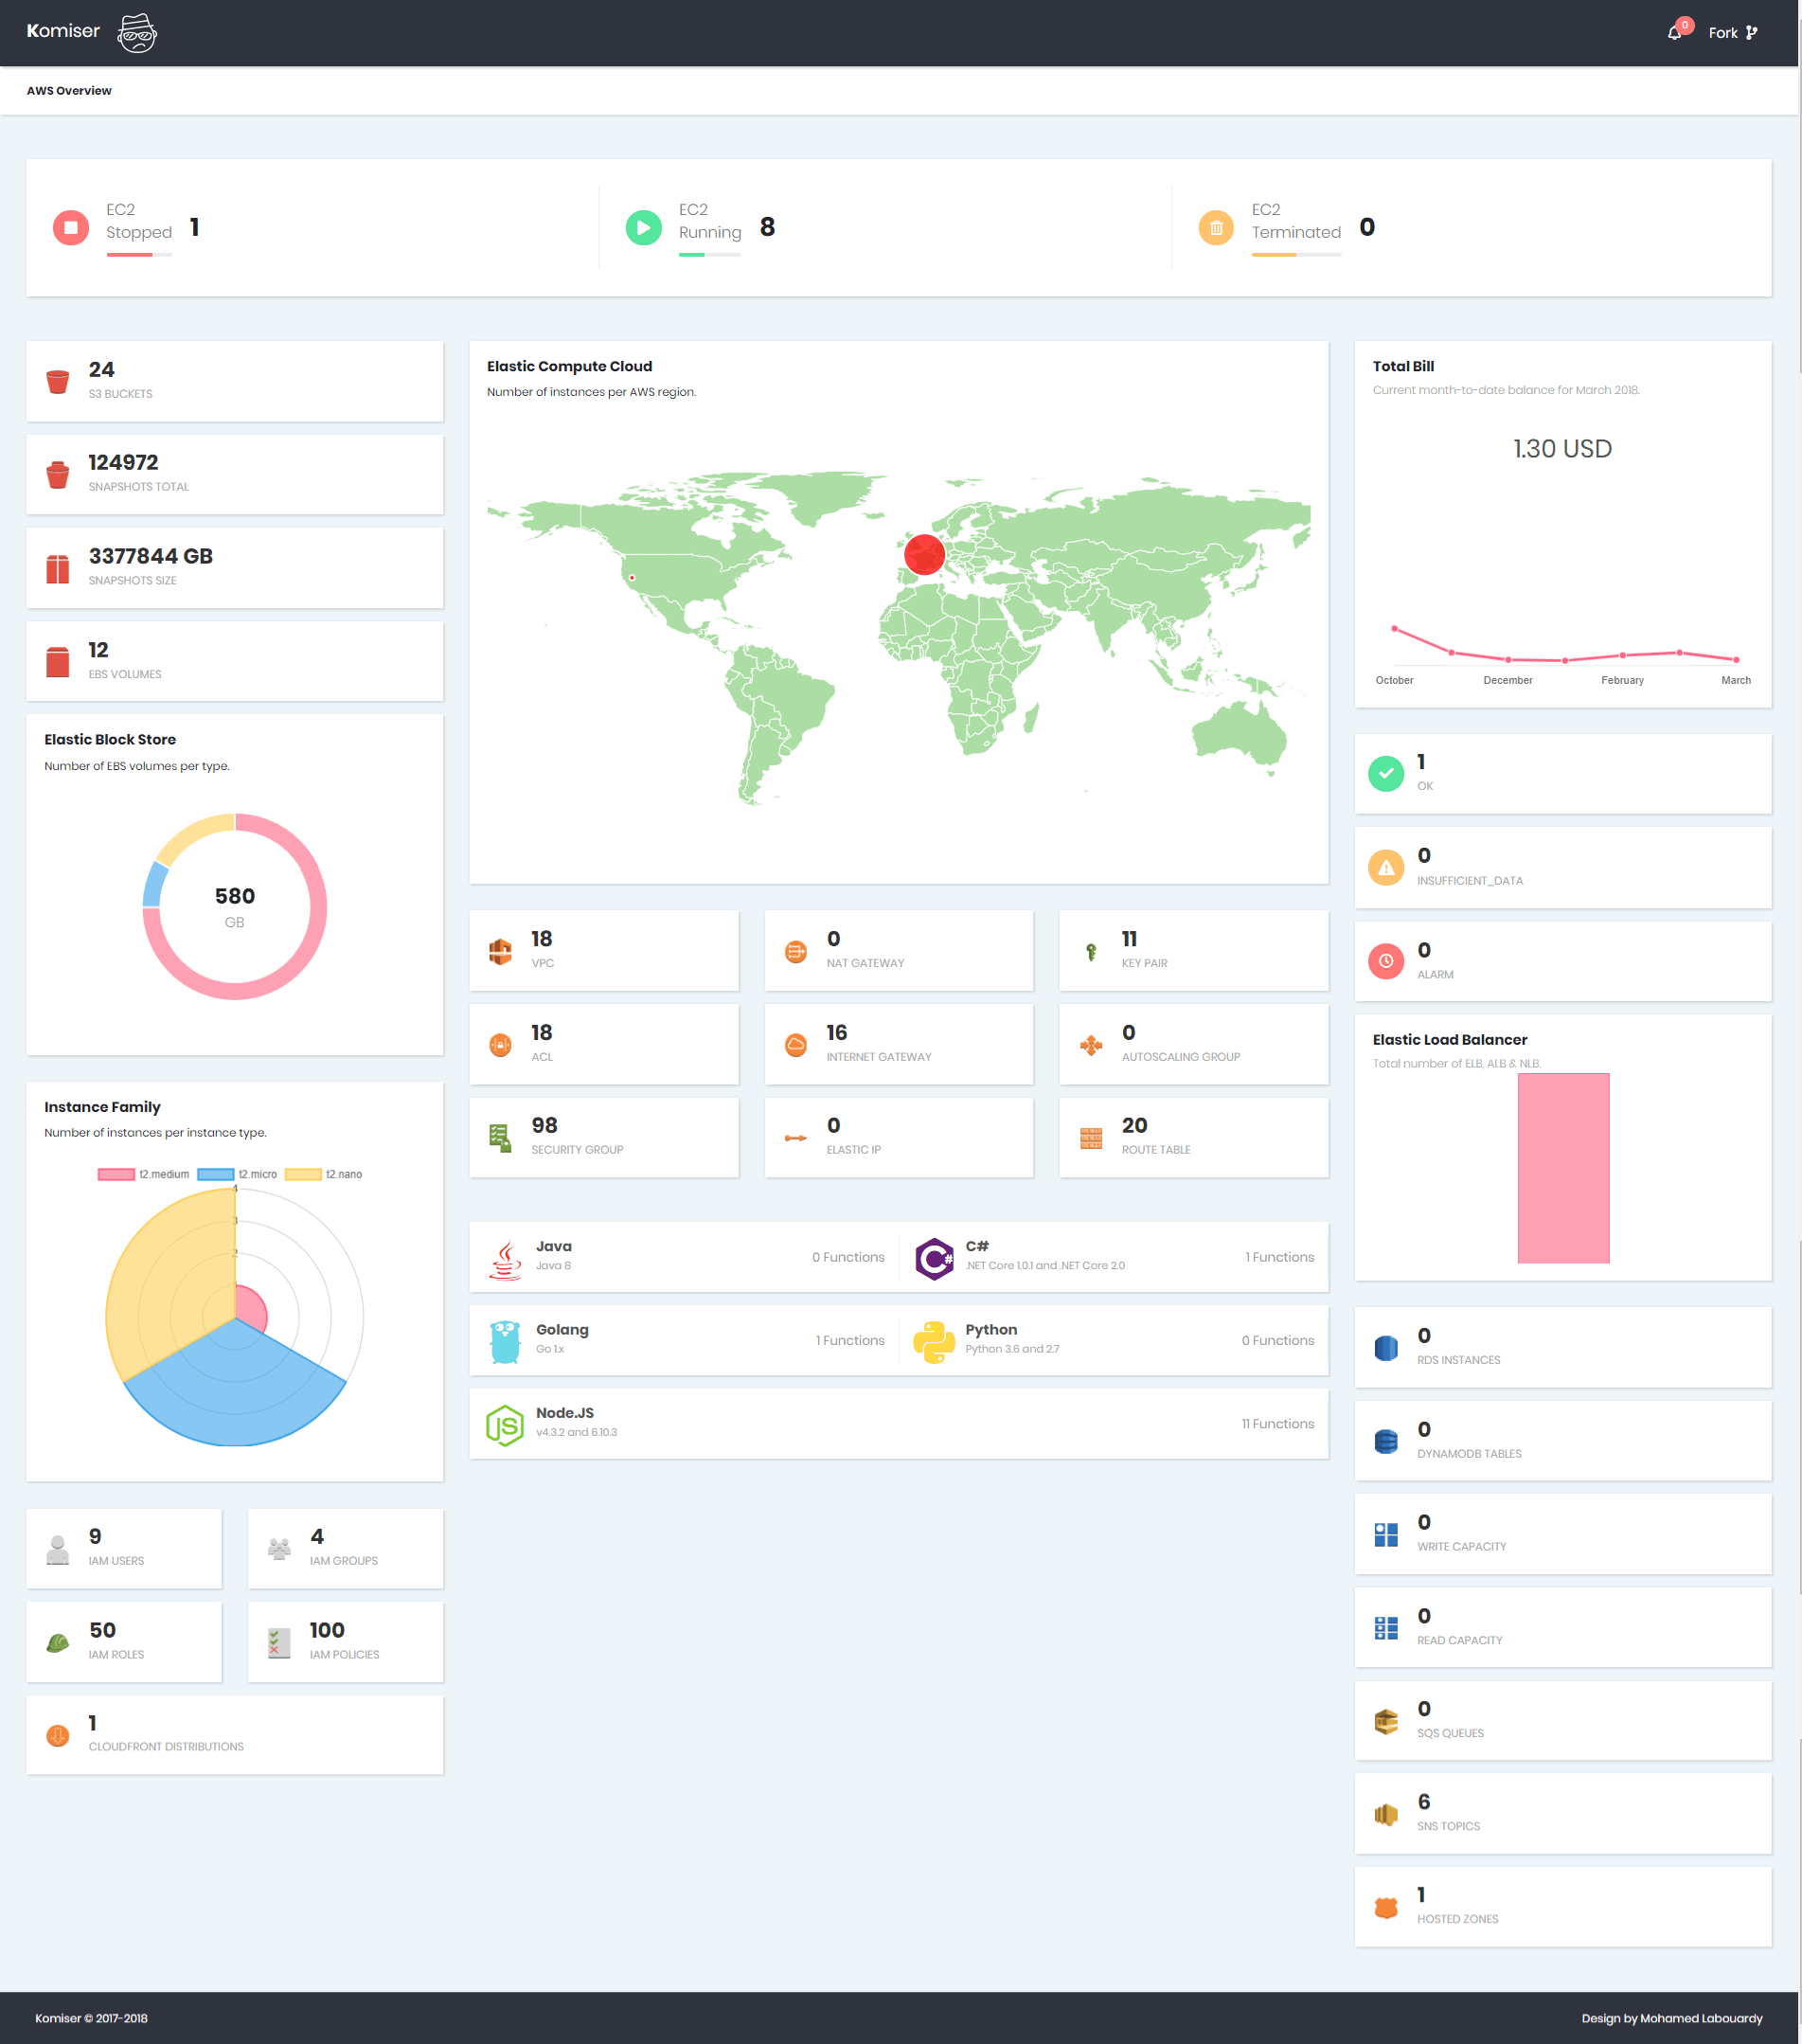
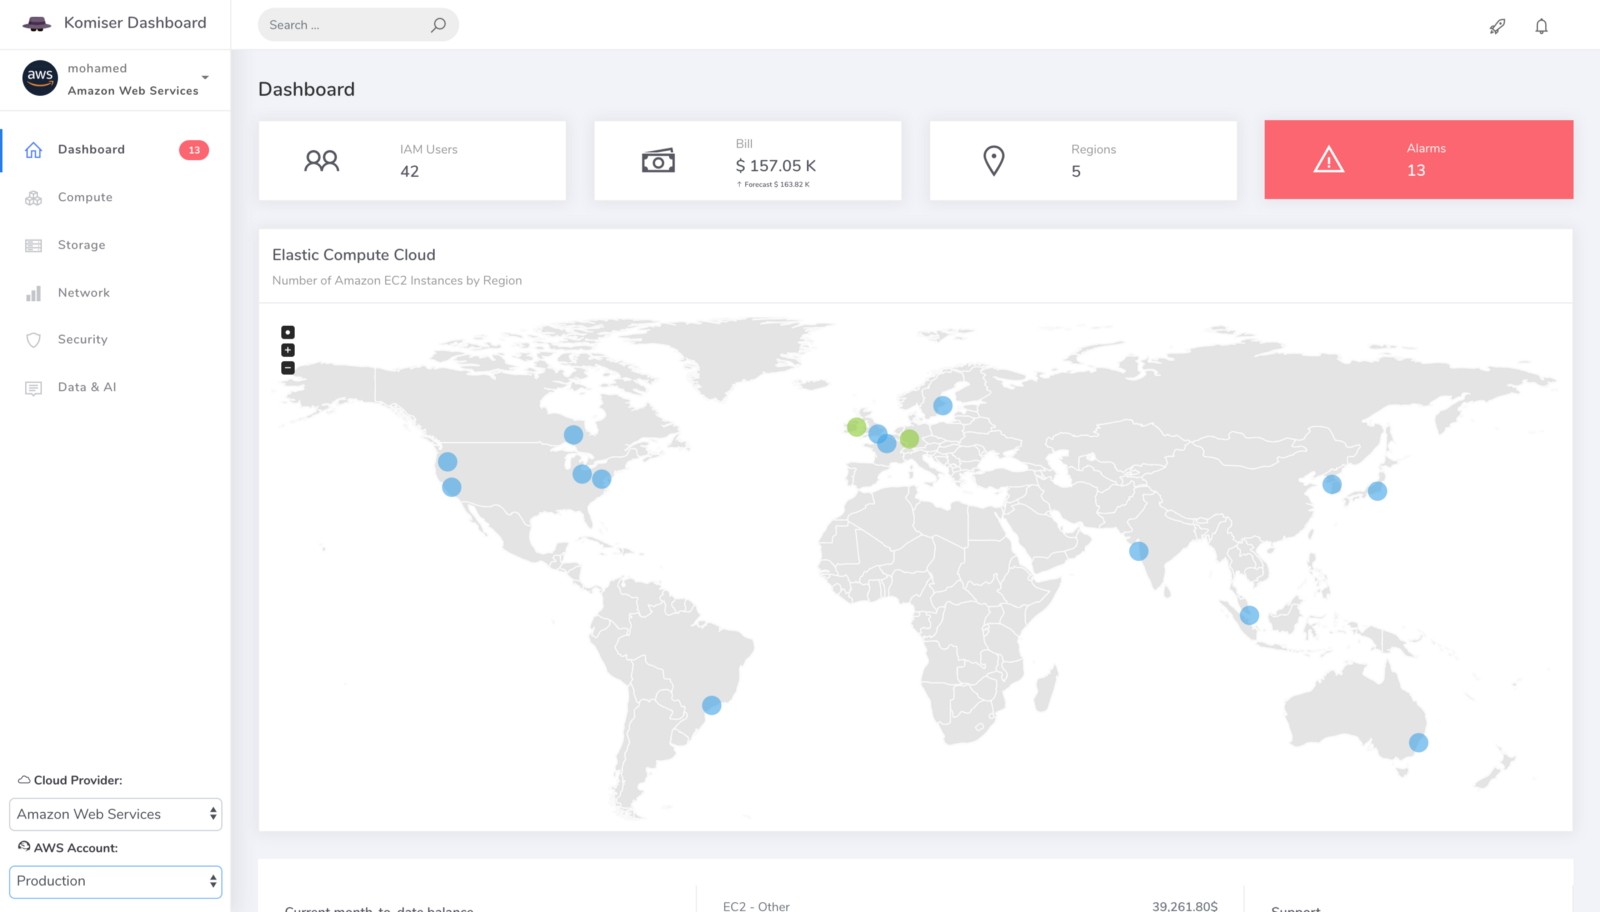
That’s why I came up with Komiser a tool that simplifies the process by querying the AWS API to fetch information about almost all critical services of AWS like EC2, RDS, ELB, S3, Lambda … in real-time in a single Dashboard.

Note: To prevent excedding AWS API rate limit for requests, the response is cached in in-memory cache by default for 30 minutes.

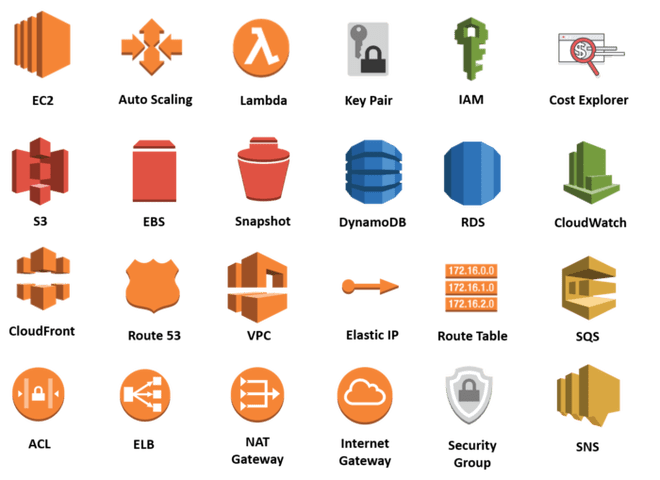
Komiser supported AWS Services:


  • Compute:
    • Running/Stopped/Terminated EC2 instances
    • Current EC2 instances per region
    • EC2 instances per family type
    • Lambda Functions per runtime environment
    • Disassociated Elastic IP addresses
    • Total number of Key Pairs
    • Total number of Auto Scaling Groups
  • Network & Content Delivery:
    • Total number of VPCs
    • Total number of Network Access Control Lists
    • Total number of Security Groups
    • Total number of Route Tables
    • Total number of Internet Gateways
    • Total number of Nat Gateways
    • Elastic Load Balancers per family type (ELB, ALB, NLB)
  • Management Tools:
    • CloudWatch Alarms State
    • Billing Report (Up to 6 months)
  • Database:
    • DynamoDB Tables
    • DynamoDB Provisionned Throughput
    • RDS DB instances
  • Messaging:
    • SQS Queues
    • SNS Topics
  • Storage:
    • S3 Buckets
    • EBS Volumes
    • EBS Snapshots
  • Security Identity & Compliance:
    • IAM Roles
    • IAM Policies
    • IAM Groups
    • IAM Users

1 – Configuring Credentials

Komiser needs your AWS credentials to authenticate with AWS services. The CLI supports multiple methods of supporting these credentials. By default the CLI will source credentials automatically from its default credential chain. The common items in the credentials chain are the following:

  • Environment Credentials
    • AWS_ACCESS_KEY_ID
    • AWS_SECRET_ACCESS_KEY
    • AWS_DEFAULT_REGION
  • Shared Credentials file (~/.aws/credentials)
  • EC2 Instance Role Credentials

To get started, create a new IAM user, and assign to it this following IAM policy:

1
2
3
4
5
6
7
8
9
10
11
12
13
14
15
16
17
18
19
20
21
22
23
24
25
26
27
28
29
30
31
32
33
34
35
36
37
38
39
40
41
42
43
44
45
46
47
48
49
50
51
52
53
54
55
56
57
58
59
60
61
62
63
{
"Version": "2012-10-17",
"Statement": [
{
"Sid": "1",
"Effect": "Allow",
"Action": [
"ec2:DescribeRegions",
"ec2:DescribeInstances",
"ec2:DescribeVolumes",
"ec2:DescribeVpcs",
"ec2:DescribeSecurityGroups",
"ec2:DescribeNatGateways",
"ec2:DescribeRouteTables",
"ec2:DescribeSnapshots",
"ec2:DescribeNetworkAcls",
"ec2:DescribeKeyPairs",
"ec2:DescribeInternetGateways"
],
"Resource": "*"
},
{
"Sid": "2",
"Effect": "Allow",
"Action": [
"ec2:DescribeAddresses",
"ec2:DescribeSnapshots",
"elasticloadbalancing:DescribeLoadBalancers",
"autoscaling:DescribeAutoScalingGroups",
"ce:GetCostAndUsage",
"s3:ListAllMyBuckets"
],
"Resource": "*"
},
{
"Sid": "3",
"Effect": "Allow",
"Action": [
"lambda:ListFunctions",
"dynamodb:ListTables",
"dynamodb:DescribeTable",
"rds:DescribeDBInstances",
"cloudwatch:DescribeAlarms",
"cloudfront:ListDistributions"
],
"Resource": "*"
},
{
"Sid": "4",
"Effect": "Allow",
"Action": [
"sqs:ListQueues",
"route53:ListHostedZones",
"sns:ListTopics",
"iam:ListGroups",
"iam:ListRoles",
"iam:ListPolicies",
"iam:ListUsers"
],
"Resource": "*"
}
]
}

Next, generate a new AWS Access Key & Secret Key, then update ~/.aws/credentials file as below:

1
2
3
4
[default]
aws_access_key_id = AWS ACCESS KEY ID
aws_secret_access_key = AWS SECRET ACCESS KEY
region = us-east-1

2 – Installation

2.1 – CLI

Find the appropriate package for your system and download it. For linux:

1
2
wget https://s3.us-east-1.amazonaws.com/komiser/1.0.0/linux/komiser
chmod +x komiser

Note: The Komiser CLI is updated frequently with support for new AWS services. To see if you have the latest version, see the project Github repository.

After you install the Komiser CLI, you may need to add the path to the executable file to your PATH variable.

2.2 – Docker Image

Use the official Komiser Docker Image:

1
docker run -d -p 3000:3000 -e AWS_ACCESS_KEY_ID="" -e AWS_SECRET_ACCESS_KEY="" -e AWS_DEFAULT_REGION="" --name komiser mlabouardy/komiser

3 – Overview

Once installed, start the Komiser server:

1
komiser start --port 3000 --duration 30

If you point your favorite browser to http://localhost:3000, you should see Komiser Dashboard:


Hope it helps ! The CLI is still in its early stages, so you are welcome to contribute to the project on GitHub.

Drop your comments, feedback, or suggestions below — or connect with me directly on Twitter @mlabouardy.

Your browser is out-of-date!

Update your browser to view this website correctly. Update my browser now

×